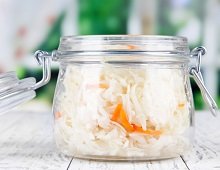
How To Easily Make Your Own Probiotic-Rich Sauerkraut
 I tend to go through phases where I want to do and make everything myself.
I want to do all the research, planning, shopping, prepping, cooking, etc.
Then I follow it up with never wanting to cook again in my life.
It’s a horribly orchestrated cycle that I should probably balance out eventually.
In any case, I’m back on the swing of do-it-myself.
I’ve gotten the knack for making homemade yogurt and it really isn’t as daunting as it seems.
It’s super versatile and convenient to have around.
But there are so many other foods out there we can make that are chock-full of friendly bugs.
Fermented food sounds intimidating but don’t worry, I did say these were easy.
I wouldn’t give you a recipe that was full of mishaps waiting to happen simply because I’m probably more terrified than anyone when it comes to confusing, time consuming recipes.
So without further ado, let’s look at an easy, probiotic-rich sauerkraut recipe.
Homemade Sauerkraut Recipe
(Makes 1 – 1½ quarts)
What you’ll need…
Ingredients:
- 1 medium head of green cabbage (around 3 lbs)
- 1 ½ tablespoons of kosher salt
- 1 tablespoon of caraway seeds (for flavor but is optional)
Equipment:
- Mixing bowl
- Cutting board
- Chef’s knife
- 2-quart mason jars
- Cloth for covering mason jar
- Canning funnel (optional)
- A smaller jelly bar that can fit within the bigger mason jar
- Clean marbles, stones, or other weight for weighing jelly jar
- Twine or rubber band to secure cloth
Instructions:
1. Clean everything.
We want to give those friendly bacteria the best chance of surviving as possible so it’s important to make sure everything is thoroughly cleaned. Wash your mason jar, jelly jar, and of course your hands very well. Also, make sure all the soap residue is gone before you begin.
2. Slice your cabbage.
Take your cabbage and slice it into quarters and then trim out the cabbage core. Cut each quarter down its length until you have 8 wedges. Then slice each cabbage wedge crosswise into very thin ribbons. (Think about how small sauerkraut usually is.)
3. Combine your cabbage and salt.
Now take the cabbage you just thinly sliced and put it into a large mixing bowl. Add in the salt by working it in with your hands. If you want caraway seeds, mix those in, too.
4. Fill the mason jar with cabbage.
Pack the 2-quart mason jar with the cabbage. This is where a canning funnel can quicken the process but if you don’t have one, that’s totally fine. Periodically use your fist to press the cabbage down into the jar. Pour any liquid from the cabbage into the jar, as well.
5. Time to weigh down the cabbage.
After you’re done packing, put the smaller jelly jar in the mouth of the larger mason jar. Weigh the jelly jar down with the clean marbles or stones. This step helps ensure that the cabbage is submerged beneath its liquid.
6. Cover the jar with cloth.
Now it’s time to cover the mouth of your mason jar with a cloth. Make sure you use twine or a rubber band to secure the cloth in place. The cloth is meant to allow airflow in and out but to keep dust or insects out. (Those wouldn’t be so yummy.)
7. Press the cabbage every couple hours.
You’re going to press the smaller jelly jar down onto the cabbage every so often, for the next 24 hours. The cabbage will naturally start to release its liquids and become more limp and the liquid will cover the top of the cabbage.
8. Add additional liquid.
This step is optional but if after 24 hours the liquid has not covered the top of the cabbage, then add 1 cup of water with 1 teaspoon of salt to the cabbage.
9. Let the cabbage ferment for 3 – 10 days.
Keep the sauerkraut at a cool room temperature (65°F to 75°F) and away from direct sunlight. If you see any cabbage rising above the liquid, be sure to press it down. Start tasting the cabbage after 3 days. If it tastes good to you, then remove the weight, put the lid on, and refrigerate. There isn’t a definite rule to when it’s “done” so this is when your preference comes into play.
If you see any foam or white buildup, just skim it off the top during or after fermentation.
10. Enjoy and store.
You did it! You made sauerkraut. It’s now time to enjoy and store it. The beauty of fermented foods is that they last quite a long time… up to 2 months and even longer if you keep it refrigerated.
In Conclusion…
If you’ve been looking for homemade recipes for fermented foods, I hope you enjoy this one!
Stay tuned for even more probiotic-rich, fermented food recipes that anyone can make.
Also, don’t forget to take your daily probiotic.
If you need help finding the perfect one for you, check out our 10 best probiotic supplements!


